


Introducing our revolutionary IoT-based indoor plant watering system! Harnessing the power of ESP32 and Blynk, we've created a cutting-edge solution for plant enthusiasts. With our innovative technology, you can effortlessly monitor and control the moisture level and temperature of your plants from anywhere in the world through the intuitive Blynk IoT app.
Say goodbye to the hassle of manual watering and hello to the future of smart irrigation. Our system utilizes state-of-the-art soil moisture sensors to determine the optimal watering schedule for your plants. The ESP32 microcontroller intelligently controls the water pump, ensuring that your plants receive the perfect amount of hydration, precisely when they need it.
Imagine the convenience of remotely checking the moisture level and temperature of your plants while you're away from home. Whether you're on vacation or simply at work, our IoT-based solution keeps you connected to your beloved greenery. Adjust settings, receive alerts, and even customize watering schedules, all with a few taps on the user-friendly Blynk app.
Experience the joy of nurturing your indoor plants with confidence, knowing that our IoT system has your back. Say goodbye to overwatering or neglecting your plants due to lack of time or uncertainty. Embrace the power of automation and watch your plants thrive like never before.
Don't miss out on the future of plant care. Join the smart gardening revolution today and transform your indoor plants into flourishing masterpieces. Welcome to the world of IoT-powered plant care – where technology meets nature in perfect harmony.
Required Components for Plant Watering System
- ESP32 DEV KIT V1
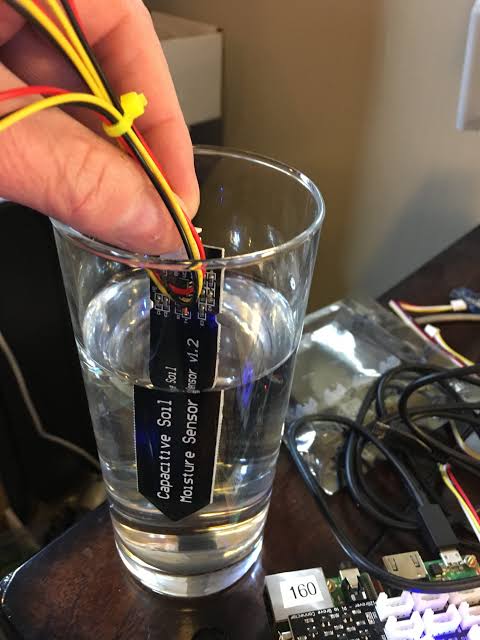
- Capacitive soil moisture sensor V2.0
- DHT11 Sensor
- 0.96″ OLED Display
- BC547 NPN Transistor
- LEDs 5mm – 4no
- 2-pin Push Button – 2no
- 5V DC Buzzer
- 5VDC Supply
- 30amp relay module
- Water pump
Circuit
ESP32 GPIOs Connected Sensors/Components D34 Capacitive moisture sensor AOUT pin D32 Push-Button to turn ON/OFF pump D33 Push-Button for changing MODE. D25 30amp relay module (controlling pump) D26 BC547 base pin (controlling Buzzer) D14 DHT11 sensor O/P pin D15 LED indicator for MODE D2 LED indicator for WiFi D21 SDA of OLED D22 SCL of OLED Connect the pump to the relay module to water the tree.

Set up Blynk IoT Cloud for the ESP32 Project
Create Blynk Template
Create Datastreams in Blynk Cloud

In the template, I have created the first Datastreams (Pin: V1, Datatype: Integer, Min Value: 0, Max Value: 100) to show the moisture level in percentage.
The next two Datastreams (Pin: V2 & V3, Datatype: Integer) will show the Temperature and Humidity reading from the DHT11 sensor.
Forth Datastream (Pin: V4, Datatype: Integer, Min Value: 0, Max Value: 1, Default Value: 1) is for changing the MODE.
Fifth Datastream (Pin: V5, Datatype: Integer, Min Value: 0, Max Value: 1, Default Value: 0) is for manually controlling the pump.
(Please refer to the above picture)
Create Web Dashboard in Blynk Cloud

After that, click and drag 1 Gauge widget, 2 Level widgets, and 2 Switch widgets and select the related Datastreams for each widget.
Then click on “Save” to save the template.
Set up Mobile Dashboard in Blynk IoT App
Now open the Blynk IoT App and tap on the device name.
Then add 1 Gauge widget, 2 Leveled Value widgets, and 2 Button widgets from Widget Box.
1. Tap on the Gauge widget and select Datastream “Moisture” with V1.
2. Tap on the first Leveled Value widget and select Datastream “Temperature” with V2.
3. Tap on the second Leveled Value widget and select Datastream “Humidity” with V3.
4. Tap on the first Button widget and select Datastream “Mode” (V4) and MODE “Switch“.
5. Tap on the second Button widget and select Datastream “Water” (V5) and MODE “Switch“.
(Please refer to the above picture)

Program ESP32 with Arduino IDE
//Techno SAP#define SensorPin 34 //D34
int sensorVal;
void setup() {
// Set up serial monitor
Serial.begin(115200);
}
void loop() {
sensorVal = analogRead(SensorPin);
Serial.print("Moisture Value: ");
Serial.println(sensorVal);
delay(1000);
}Connect the Moisture Sensor AOUT pin with D34 and supply 3.3V across VCC and GND.
Then open the serial monitor with baud rate 115200.


This code appears to be for a plant care system using an ESP32 microcontroller and various sensors. It includes functionality for measuring soil moisture, temperature, and humidity, as well as controlling a relay to water the plant.
The code initializes the necessary libraries and defines the pin connections for the sensors, buttons, LEDs, and other components. It also sets up the Wi-Fi credentials and Blynk authentication token for connecting to the Blynk server.
The main functionality of the code is implemented in the loop() function, which continuously runs and performs the following tasks:
Calls Blynk.run() to handle Blynk-related operations.Executes the timer.run() function to trigger scheduled tasks defined by the BlynkTimer library.Checks the state of the buttons using button2.check() and controlMoist() functions.Sends sensor data to the Blynk server by calling the sendSensor() function periodically.The code also includes various functions for handling events related to button presses and Blynk connections, such as button1Handler(), button2Handler(), BLYNK_CONNECTED(), and BLYNK_WRITE().
Additionally, there are helper functions for reading sensor values (getMoisture() and getWeather()), controlling the OLED display (displayData()), and managing the buzzer (controlBuzzer()).
In summary, this code sets up a plant care system using an ESP32, reads sensor data, controls a relay for watering the plant, and communicates with the Blynk server for remote monitoring and control.
Source Codes for Blynk ESP32 Plant Monitoring System
int sensorVal;
int moisturePercentage;
bool toggleRelay = LOW; //Define to remember the toggle state
bool prevMode = true;
int temperature1 = 0;
int humidity1 = 0;
String currMode = "A";
char auth[] = BLYNK_AUTH_TOKEN;
ButtonConfig config1;
AceButton button1(&config1);
ButtonConfig config2;
AceButton button2(&config2);
void handleEvent1(AceButton*, uint8_t, uint8_t);
void handleEvent2(AceButton*, uint8_t, uint8_t);
BlynkTimer timer;
DHT dht(DHTPin, DHTTYPE);
void checkBlynkStatus() { // called every 3 seconds by SimpleTimer
bool isconnected = Blynk.connected();
if (isconnected == false) {
Serial.print("Blynk Not Connected ");
digitalWrite(wifiLed, LOW);
}
if (isconnected == true) {
digitalWrite(wifiLed, HIGH);
//Serial.println("Blynk Connected");
}
}
BLYNK_CONNECTED() {
Blynk.syncVirtual(VPIN_MoistPer);
Blynk.syncVirtual(VPIN_RELAY);
Blynk.syncVirtual(VPIN_TEMPERATURE);
Blynk.syncVirtual(VPIN_HUMIDITY);
//Blynk.syncVirtual(VPIN_MODE_SWITCH);
Blynk.virtualWrite(VPIN_MODE_SWITCH, prevMode);
}
BLYNK_WRITE(VPIN_RELAY) {
if(!prevMode){
toggleRelay = param.asInt();
digitalWrite(RelayPin, toggleRelay);
}
else{
Blynk.virtualWrite(VPIN_RELAY, toggleRelay);
}
}
BLYNK_WRITE(VPIN_MODE_SWITCH) {
if(prevMode != param.asInt()){
prevMode = param.asInt();
currMode = prevMode ? "A" : "M";
digitalWrite(ModeLed, prevMode);
controlBuzzer(500);
if(!prevMode && toggleRelay == HIGH){
digitalWrite(RelayPin, LOW);
toggleRelay = LOW;
Blynk.virtualWrite(VPIN_RELAY, toggleRelay);
}
}
}
void controlBuzzer(int duration){
digitalWrite(BuzzerPin, HIGH);
delay(duration);
digitalWrite(BuzzerPin, LOW);
}
void displayData(String line1 , String line2){
display.clearDisplay();
display.setTextSize(2);
display.setCursor(30,2);
display.print(line1);
display.setTextSize(1);
display.setCursor(1,25);
display.print(line2);
display.display();
}
void getMoisture(){
sensorVal = analogRead(SensorPin);
if (sensorVal > (wetSoilVal - 100) && sensorVal < (drySoilVal + 100) ){
moisturePercentage = map(sensorVal ,drySoilVal, wetSoilVal, 0, 100);
// Print result to serial monitor
Serial.print("Moisture Percentage: ");
Serial.print(moisturePercentage);
Serial.println(" %");
}
else{
Serial.println(sensorVal);
}
delay(100);
}
void getWeather(){
float h = dht.readHumidity();
float t = dht.readTemperature(); // or dht.readTemperature(true) for Fahrenheit
if (isnan(h) || isnan(t)) {
Serial.println("Failed to read from DHT sensor!");
return;
}
else {
humidity1 = int(h);
temperature1 = int(t);
// Serial.println(temperature1);
// Serial.println(humidity1);
}
}
void sendSensor()
{
getMoisture(); // get Moisture reading
getWeather(); // get reading from DHT11
displayData(String(moisturePercentage) + " %", "T:" + String(temperature1) + " C, H:" + String(humidity1) + " % " + currMode);
Blynk.virtualWrite(VPIN_MoistPer, moisturePercentage);
Blynk.virtualWrite(VPIN_TEMPERATURE, temperature1);
Blynk.virtualWrite(VPIN_HUMIDITY, humidity1);
}
void controlMoist(){
if(prevMode){
if (moisturePercentage < (moistPerLow)){
if (toggleRelay == LOW){
controlBuzzer(500);
digitalWrite(RelayPin, HIGH);
toggleRelay = HIGH;
Blynk.virtualWrite(VPIN_RELAY, toggleRelay);
delay(1000);
}
}
if (moisturePercentage > (moistPerHigh)){
if (toggleRelay == HIGH){
controlBuzzer(500);
digitalWrite(RelayPin, LOW);
toggleRelay = LOW;
Blynk.virtualWrite(VPIN_RELAY, toggleRelay);
delay(1000);
}
}
}
else{
button1.check();
}
}
void setup() {
// Set up serial monitor
Serial.begin(115200);
// Set pinmodes for GPIOs
pinMode(RelayPin, OUTPUT);
pinMode(wifiLed, OUTPUT);
pinMode(ModeLed, OUTPUT);
pinMode(BuzzerPin, OUTPUT);
pinMode(RelayButtonPin, INPUT_PULLUP);
pinMode(ModeSwitchPin, INPUT_PULLUP);
digitalWrite(wifiLed, LOW);
digitalWrite(ModeLed, LOW);
digitalWrite(BuzzerPin, LOW);
dht.begin(); // Enabling DHT sensor
config1.setEventHandler(button1Handler);
config2.setEventHandler(button2Handler);
button1.init(RelayButtonPin);
button2.init(ModeSwitchPin);
// Initialize and clear the OLED display
if (!display.begin(SSD1306_SWITCHCAPVCC, 0x3C)) {
Serial.println(F("SSD1306 allocation failed"));
for (;;) ;
}
display.clearDisplay();
display.setTextSize(2);
display.setTextColor(WHITE);
display.setCursor(10, 10);
display.println("Welcome!");
display.display();
delay(2000); // Add a 2-second delay
display.clearDisplay();
display.setTextSize(1);
display.setTextWrap(true);
display.setTextColor(WHITE);
display.setCursor(2, 2);
display.println("Techno SAP");
display.println("irrigation");
display.println("system started...");
display.display();
// Connect to Wi-Fi and Blynk server
WiFi.begin(ssid, pass);
timer.setInterval(2000L, checkBlynkStatus); // check if Blynk server is connected every 2 seconds
timer.setInterval(3000L, sendSensor); // display and send sensor reading every 3 seconds
Blynk.config(auth);
controlBuzzer(1000);
digitalWrite(ModeLed, prevMode);
}
void loop() {
Blynk.run();
timer.run(); // Initiates SimpleTimer
button2.check();
controlMoist();
}
_ 🄸🄽🅂🅃🄰🄶🅁🄰🄼 👇🏾 https://z-p42.www.instagram.com/aryanpandey699/ _______________________________________________________ (ABOUT ) Welcome to the "TECHNO SAP" YouTube channel, where you can explore the fascinating world of science with me, Aryan Pandey. As the founder and host of this channel, I am dedicated to sharing my passion for science and delivering exciting and informative videos on various scientific topics. From mind-blowing experiments to cutting-edge discoveries and technologies, you'll find it all here on my channel. So, join me on this incredible journey of learning and discovery, and don't forget to hit that SUBSCRIBE button and turn on the notification bell to stay updated on my latest uploads. _________________________________________________________ If you're interested in exploring more of the world of science, you're in the right place. Join me as we dive into exciting experiments, mind-blowing discoveries, and cutting-edge technology. Hit the SUBSCRIBE button and turn on the notification bell to stay updated on my latest uploads. For any queries or questions, feel free to contact me on my email address, aryan2020pandey@gmail.com. Thank you for watching, and I look forward to sharing more valuable content with you soon. #TechnoSAP" 🙏🙏