
.jpg)

Introduction
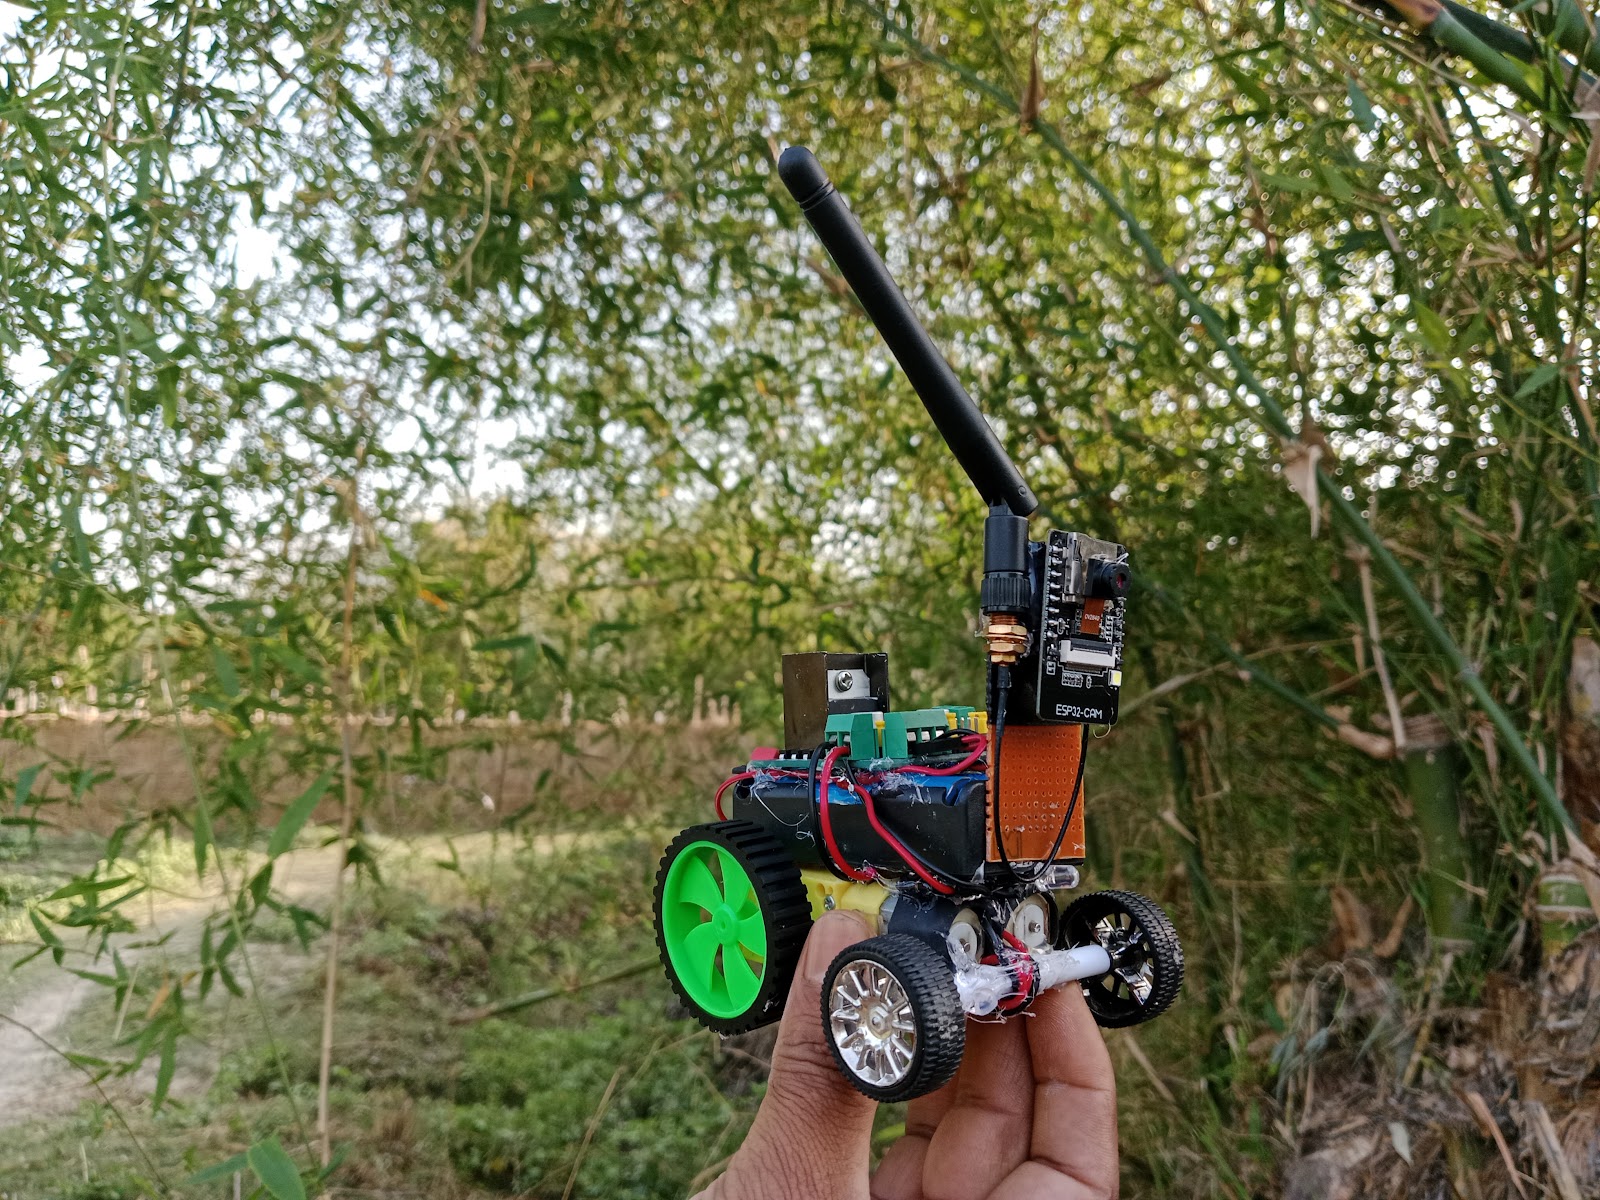
Hello everyone, my name is Aryan Pandey, and I am excited to share with you today a project I have been working on - a spy robot using an ESP Cam module and L298 motor driver. I run a YouTube channel called Technosap, where I share tutorials and DIY projects related to technology. The spy robot is a great project that anyone can build with the right materials and some coding skills. So, let's dive into the details.

What is a Spy Robot?
A spy robot is a small robotic device that can be controlled remotely and used for surveillance purposes. It can move around discreetly in places where humans may have difficulty accessing, such as under furniture, through narrow gaps, or in the dark. It can be equipped with various sensors and cameras to capture visual or audio information, and transmit it back to the controller. Spy robots can be useful for security purposes, monitoring pets, or even for exploring hard-to-reach areas.
Materials Required
To build a spy robot, you will need the following materials:
- ESP Cam module

- L298 motor driver

- Two DC motors
-
- Wheels and chassis

- Battery pack

- Jumper wires
- Battery holder
Switch And LED


.jpeg)
- ESP Cam Module
The ESP Cam module is a low-cost, high-performance camera module that is designed for use with the ESP32 microcontroller. It has a resolution of 2 MP and can capture both JPEG and BMP images. It also features built-in Wi-Fi, which allows for wireless transmission of data. The ESP Cam module is perfect for our spy robot as it will enable us to capture images and transmit them back to the controller.
L298 Motor Driver
The L298 motor driver is a high-current dual full-bridge driver that can be used to control DC motors. It can handle up to 2 amps per channel and can operate at voltages up to 46V. We will use the L298 motor driver to control the movement of our spy robot.
DC Motors
We will need two DC motors to power the movement of our spy robot. You can use any DC motors with a suitable torque rating for your application. You will also need wheels and a chassis to mount the motors.
Battery Pack
To power the ESP Cam module, L298 motor driver, and DC motors, we will need a battery pack. You can use any battery pack with a voltage rating of 7-12V, depending on the voltage rating of your DC motors.
Jumper Wires
You will need a set of jumper wires to connect the ESP Cam module, L298 motor driver, and DC motors together. You can use male-to-male, male-to-female, or female-to-female jumper wires depending on your requirements.
Screwdriver
You will need a screwdriver to assemble the wheels and chassis of your spy robot.
Building the Spy Robot
Now that we have all the materials we need, let's start building our spy robot. Here are the steps:
- Assemble the wheels and chassis of your spy robot using a screwdriver.
- Connect the two DC motors to the L298 motor driver using jumper wires. Make sure to connect the wires to the correct pins on the motor driver.
- Connect the L298 motor driver to the ESP Cam module using jumper wires. Again, make sure to connect the wires to the correct pins on both the motor driver and the ESP Cam module.
- Connect the battery pack to the L298 motor driver and ESP Cam module using jumper wires. Make sure to connect the positive and negative wires correctly.
- Write a code to control the movement of the DC motors and the capture of images from the ESP Cam module. You can
Here is a step-by-step explanation of how to build a spy robot using the ESP cam module and L298N motor driver, along with a sample code block and circuit diagram.
Materials Required:
- ESP32-CAM or ESP32-S module with OV2640 camera
- L298N motor driver module
- DC motors
- Robot chassis
- 9V battery or equivalent power source
- Jumper wires
- Breadboard
Circuit Diagram:


Instructions:
- Connect the ESP cam module to the L298N motor driver module using jumper wires. Use the following connections:
- CAM_GPIO_14 (D5) to IN1
- CAM_GPIO_12 (D6) to IN2
- CAM_GPIO_27 (D7) to IN3
- CAM_GPIO_26 (D8) to IN4
- GND to GND
- 5V to VCC
- Connect the DC motors to the L298N motor driver module. Use the following connections:
- Motor 1: Connect the red wire to OUT1 and the black wire to OUT2
- Motor 2: Connect the red wire to OUT3 and the black wire to OUT4
- Connect the power source (9V battery or equivalent) to the L298N motor driver module. Use the following connections:
- Connect the positive terminal of the battery to the +12V input of the L298N motor driver module
- Connect the negative terminal of the battery to the GND input of the L298N motor driver module
Connect the ESP cam module to the breadboard.
Connect the L298N motor driver module to the breadboard.
Connect the DC motors to the breadboard.
Connect the power source to the breadboard.
Connect the ESP cam module to your computer using a USB cable.
Open the Arduino IDE and select the appropriate board (ESP32 Dev Module) and port.
Install the required libraries:
- ESP32 Camera Library (https://github.com/espressif/arduino-esp32/tree/master/libraries/esp32-camera)
- L298N Library (https://github.com/brunocalou/L298N)
- Upload the following code to the ESP cam module: